Saturday, November 20, 2010

Vegetarian Peanut Stew: Local Veggies with a West African Twist

For those not schooled in the joys of turning ho-hum local vegetables into delicious masterpieces, a stew for which the main ingredients are cabbage and squash might sound anything but adventurous. But a few exotic flavours can make a huge difference! I used the last of my delicious local organic vegetables to produce this West African delight based on a recipe from my very favourite cookbook: Simply in Season, by Mary Beth Lind and Cathleen Hockman-Wert. The tomatoes, cabbage, squash, garlic, and onions were all locally grown.


This is a rich, almost meaty vegetarian stew. I find that the cilantro and red pepper add some important flavours, and I’d recommend the crushed peanuts—they provide a delicious crunchy texture. I love this recipe so much that I double it so that I have some in the freezer for later. 

The only downside is that you wouldn’t want to serve this stew to your calorie-counting friends, or those who have nut allergies. 

Ingredients:
2 tbsp peanut oil
1 chopped onion
2-3 cloves of minced garlic
2-3 cups of chopped cabbage
3 cups of squash, cubed (you can also substitute sweet potato here)
fresh or dried hot red pepper, to taste
1 tsp of grated ginger root
1 cup of liquid (apple juice, tomato juice, broth or water)
1 apple, chopped (optional)
3 cups of tomatoes, chopped
1/2 cup of peanut butter

Toppings:
ground or crushed peanuts
fresh cilantro
fresh green onions

Fry onion and garlic in oil until soft. Add cabbage, squash, ginger, pepper and liquid. Simmer until squash is softened. Add apples, tomatoes, and peanut butter; heat through. Keep warm until ready to serve. Serve with toppings optional. 


* A note on heat: I have read that West African dishes are notoriously spicy. So if you want to be authentic, spice it up! If you don't have a spicy tooth, don't worry. This dish is still delicious when only mildly spiced.

Monday, November 1, 2010

A Gift, A Celebration

There is something in the way the wind catches the leaves—something about how the sun falls on the tall yellow grasses and they glow, almost as if the energy of the sun is captured momentarily and turned back toward the world, rippling in the breeze like liquid gold. It is a gift, and it is not for me alone.

Forgive me while I wax poetic, but every once in a while, I have a moment in the outdoors that reminds me of all it is that I have come to know (or at least think I know). On a recent October morning, having taken the day off, I put on my jacket and enjoyed my hot breakfast out in the autumn sunshine. Sitting there, sipping my coffee, something struck me. I think it was the beauty that is always occuring in the right now. So I struck out, to walk around the field that is my back yard. Up until that point, I had been unsure whether or not we would regret the decision to move into a country home. But that morning I remembered why I was there. It’s been so long since the sun has touched me like that. Somewhere deep inside of me, something was stirring. I’m waking up.

We moved here for various reasons, a big one for me being that we would finally be able to grow a large garden and live off of the fruits of our labour. I’m a farmer. It’s in my blood. And this summer, as a member of a local CSA, I was reminded of how pleasurable it is to be nourished by, and connected to, the earth under my feet. I had forgotten, in the 7 years since I left the farm, how much that meant to me. I haven’t lived in a place where I could be alone in the wind and the sun for a long time. I feel as if I have come home again.

To date, this blog has been about cooking. But I think it will go deeper than that. For me, cooking is a celebration of the earth and the nourishment that it provides. I think that is what this blog will come to be—a way to share that celebration with you. 

Thursday, October 14, 2010

Soup Season

I'm back! And I think I have a really legitimate reason for not writing for over a month and a half-- first, I went on vacation to Nova Scotia. Then, I spent 3 weeks moving, and 2 weeks after that setting up house. We are finally settled into our big new country home... and we have an acceptable internet connection. So I have commenced creative cooking (and writing) once more. 


With the food co-op I've been a part of this summer, I've really been enjoying the challenge of using all of the interesting vegetables I receive each week. This time of year the vegetables that are being harvested lend themselves to delicious fall soups. So, I've been testing out some recipes. Last week we had a delicious squash and pumpkin soup, and this week I tried out a potato kale soup recipe from my Simply in Season cookbook which I am a really big fan of. I had never tried kale before I joined the co-op, but now I'm hooked on this extremely nutritious vegetable.


Now, I wasn't in blog mode when I was cooking, and my internet is pretty slow, so the pictures are few and not actually of the soup-- just pictures of some vegetables that I took 5 minutes ago. Hope that's good enough for you!

Squash and Pumpkin Soup (with apples!)


I love this soup because it combines some of the best fruits of the harvest. 


Ingredients


1 butternut squash
the guts of one pumpkin, scraped, seeds removed
2 tbsp of cooking oil
2 apples, cored and sliced
2 cloves of garlic
1 medium onion
cumin, coriander, cardamom, nutmeg and cloves
1 stick of cinnamon
1 vegetable oxo cube
water


Rather than baking the squash and pumpkin as most recipes require, I chose to peel the squash and cut it into chunks, and scrape the insides out of the pumpkin as much as possible without sacrificing the shell, which we want to keep for jack o' lantern purposes. Then, I threw the pumpkin, squash and apples into a pot with a little water and 1 tbsp of oil and cooked the crap out of it for a while.


In the mean time, I sauteed the onions and garlic in the remaining oil until soft, adding the spices and frying for a few more minutes. I added the onion mixture to the pot with the cinnamon stick and let it simmer until everything was very soft, about 30 more minutes. At this point, having a hand blender came in really handy-- it's one kitchen tools I very much enjoy having (thanks Rhonda). It takes a lot of the work and danger [of getting burnt] out of soup making.  I took out the cinnamon stick and blended the soup until smooth, but if you want you can leave a few chunks of squash in there for texture. Once it was blended, I added the oxo cube and as much water as I felt it needed, until it was of a soup-like consistency. 


And voila! A souper dinner is served (you didn't think I was going to be able to resist that one, did you?)


Next week: 2 great ways to cook my new favourite vegetable. Kale!

Tuesday, August 31, 2010

On the Lam(b)

Hello readers! Apologies for trying to be punny: I've been MIA for the past few weeks because life got pretty busy there for a bit! In the past month, I went to a family reunion, visited my grandparents at their cottage, and did a big hiking trip in Algonquin, all while working and organizing a big move to a new house! Oh, the joys of summer. Needless to say, I didn't make much time for writing, but I'm back and excited to tell you all about this delicious recipe for Lamb Tourtiere that I rustled up last month when my parents came for a visit.

When you have an extra pie crust kicking around in the freezer, tourtiere is a great (and quick) way to use it while providing a delicious family meal. The seasonings and spices are key, here-- meat pie isn't delicious unless you season it amply. And if you try it out, please be experimental and feel free to depart from the recipe, as that is what tourtiere is meant to be.

Tourtiere is traditionally made with ground pork, but as usual, I just used what I had on hand.

For the crust, I simply used the reliable old 2 crust recipe that has been on the Crisco box since I was a kid. I've tried other methods, and some were great, but those were usually the ones involving lard and sour cream and other not-so-healthy ingredients. Plus, Crisco is cheaper.

For the stuffing, I used an assortment of fresh garden delights and a few items from the pantry: onions, garlic, celery, garlic scapes, and green onions, as well as some herbs and spices including parsley, sage, thyme, a bit of [unnecessary] oregano, cinnamon, savory, and cloves. Finally, you'll want to boil some potatoes to hold it all together.


Making the stuffing is as easy as mixing all of this together. Cook the meat in beef or vegetable stock for a bit of extra flavour, and add the onions, celery and garlic when it's almost cooked through. After a few minutes, stir in the herbs and spices, and additional salt and pepper to taste. When it's looking like you might want to forget the crust and shovel it into your mouth right now, resist the urge, stir it all together with the boiled potatoes, and fill the pie crust.


Now here's where you can get a bit creative/unique. Some people are really into decorating their pie crusts and making them look amazing. I am not really the decorative type, at least not with food. I mean, food staging is fine, but I don't think I would go so far as cutting mini leaves out of the pastry and making a picture on top. But, stranger things have happened, and maybe when I have more spare time I'll try it out. In the mean time, I just beat and egg and brush it over the crust to make it shiny and appetizing.
Of course, I don't have a picture of the finished product, but you get the idea.

And that's all there is to it!

I love trying new things, especially in terms of food. So feel free to add some crazy things to this recipe to make it your own. For some reason, curry comes to mind.

Until next time, keep fit, and have fun!

Saturday, July 31, 2010

Bread Maker (not the machine, me!)

Isn't it fun to experiment with recipes? My favourite activity on a lazy (or not so lazy) Sunday afternoon is to cook or bake. But it's not my style to plan ahead: I don't find a recipe, and then go out and get the ingredients. My preferred method is to wing it. I use what I have on hand and alter a recipe to fit what's available, or I find a recipe that perfectly suits what I've got. Here are two breads that I made that fit these descriptions.


The first recipe is from Jim Lahey's no knead bread cookbook, which I was perusing one day while throwing together the ingredients for bread. I thought I would try something different, and I happened to have plenty of carrots, so I made:


Carrot Bread

The odd thing about this recipe is that it really isn't so much about the carrots at all. It calls for all sorts of interesting ingredients, including currants (which, oddly enough, I also had on hand), walnuts, and cumin seeds as well.

bread flour- 3 cups
salt- 1 1/4 tbsp
dry active yeast- 1/4 tbsp
freshly squeezed carrot juice- 1 1/2 cups
currants- 3/4 cup
coarsely chopped walnuts- 3/4 cup
cumin seeds- 1 tbsp

Here's how it looked throughout the process:

Step 1- : process the carrots for carrot juice
Step 2- Put the carrots through the food mill to extract the carrot juice.

(I used the leftover carrot pulp the next day on a salad-- but I kind of wish it had been in the bread).


Step 3- Add the carrot juice and some pulp to the usual mixture of bread ingredients.


Step 4- Once it's well mixed, leave it to rise for 18 to 24 hours.


Step 5- Meanwhile, observe while your friends blow up a dingy in your living room. Go for a paddle on the river, dragging the dingy behind your canoe (this step is optional).


Step 6- Once the dough has risen, knead it as much or as little as you wish—I like to deviate from the recipe and knead it quite a bit, which I find makes a softer bread. Then I let it rise for another hour or so before baking. Bake at 375 in a covered pot or pan of your choice until the crust is dark brown (I used aluminum foil over my bread pan).


Ta da! Lovely orange carrot bread. To be honest, this bread was surprisingly lacking the flavour department. It was good, but it wasn’t the best. 

Not like this one:

Currant & Spice Bread

If the first bread was the kind where I find a recipe that suits what I have on hand, this is definitely the kind where I just make it up as I go along. 

I had decided to do one normal loaf, and another experimental one. On a whim, I grabbed the jar of dried currants I that had been sitting on the shelf for a while, and threw those in along with some cinnamon and cloves, and a bit of sugar. The result was way better than I had expected! It might have also had something to do with the mixture of flours I used, but who knows, really. 

1 cup bread flour
1 cup whole wheat flour
1 cup spelt flour
1 1/4 tsp salt
1/2 tsp yeast 
1 1/3 cups cold water
about 1 cup of dried black currants
1 tsp ground cinnamon
1/2 tsp ground cloves
1 or 2 tbsps of brown sugar, honey, or maple syrup

The process is really the same as above (after the carrot juice part) so I'll skip all of the work. Here is the finished product next to a loaf of 9-grain bread that was made at the same time. 


And that's all for this lesson in bread-making. Stay tuned for the ins and outs of homemade Lamb Tourtiere!


Wednesday, July 14, 2010

Happy Birthday Gina!

Birthday Cake!

This is one of my fondest childhood memories. Every time my birthday rolled around, my Mom would try (in vain) to hide the fact that she was busily preparing some sort of special treat. Although she tries to deny it, my Mom is a talented baker. I remember the many interesting cakes she would create, including a cake shaped like Rupert, a storybook character that I loved; one shaped like a bunny, for my sister whose birthday is near Easter; and  a delicious zucchini chocolate cake, which is my very favourite cake of all. It's the most moist and flavourful cake I've ever tasted.


I, too, love the challenge of a great cake. Recently the opportunity to spend an entire Saturday baking birthday cake (from scratch!) fell into my lap. So I made this:


White Layer Cake with Cherry Filling and Whipped Cream Icing

White Cake (From Better Homes and Gardens New Cook Book, 12th Edition):

4 egg whites
2 cups of cake and pastry flour
(all purpose will do)

1 tsp baking powder
1/2 tsp baking soda
1/8 tsp salt
1/2 cup shortening or softened butter
1 3/4 cups sugar
1 tsp vanilla
1 1/3 cups buttermilk or sour milk*


To make sour milk, mix 1 tablespoon of lemon juice or vinegar with 1 or 2% milk.
  • Let the whites sit at room temperature for 30 minutes. Meanwhile, grease two 8 or 9-inch baking pans. Mix together dry ingredients. 
  • Beat shortening with an electric mixer until smooth. Add sugar and vanilla and beat until combined. Add egg whites one at a time, alternating with the flour mixture. Once all ingredients are well-combined, pour mixture into baking pans, dividing equally. 
  • Bake in a 350 degree oven for 20 to 30 minutes until golden brown. Cool in the fridge until chilled through.
Cherry Pie Filling (from various internet recipes combined to suit my needs):
2 cups of fresh pitted cherries (I got mine from the Guelph Farmer's Market)
1/2 cup of sugar
1/2 cup of water
2 tablespoons corn starch
  • Cook cherries and water in a small pot until they release their liquid. 
  • Add sugar and cornstarch and continue cooking until thickened. Be careful not to burn it! 
  • Place the filling in the pot to chill while you prepare the icing.
Whipped Cream Icing:
1 small carton of whipping cream
1 tsp vanilla extract
1/2 cup of sugar
3 or 4 tablespoons of cherry pie filling
  • Cool the beaters and bowl before you start. 
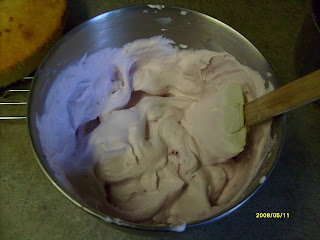
  • Combine the whipping cream, vanilla, and sugar in a bowl and beat until hard peaks form. 
  • Stir in the cherry pie filling and let the mixture cool in the fridge.
When all of the elements of the cake are cooled, use a bread knife or a cake slicer to cut the rounded top off of the 2 cakes. Get rid of the crumbs. Place the bottom layer of the cake on the serving dish. Spread the pie filling over it, making sure that it is even all the way to the edges. Top it with the second cake. Even out any filling the oozes out. Spread the whipped cream over the cake with a butter knife, starting at the top and working it over the sides. 

Now, decorate!


The decorations were actually the hardest part. I am not a cake decorator! In the future I will leave that task to someone more artistic.


And there you have it. A lovely cake, fit for any birthday party. I hope Gina enjoyed eating her birthday cake as much as I enjoyed making it.


Sunday, July 11, 2010

The First Little Bit

Welcome!


At the request of a few friends, I decided to share a few of my culinary adventures and experiments with anyone who is interested. This post will be a summary of a few of the things I have done over the past year or so. I don't cook professionally, or even that well, but I do like to try different things and take pictures of them. I hope you enjoy!


Please do comment if you can. I'd love hear any thoughts, ideas, or feedback.


For future posts, I will share the recipe if possible, giving credit where credit is due. However, for this post, I will refrain because I made most of these things so long ago that I don't even know where the recipes came from. In most cases, I also alter the recipe. When that's the case, I'll let you know.


Tiramisu


The date stamp on that picture is wrong-- I'm pretty sure I made it last fall. Please forgive the less-than-professional quality pictures and food staging.


I think this recipe is from my trusty old Better Homes and Gardens Cookbook. There were some shameful substitutions, including cream cheese instead of mascarpone, but I was still pretty happy with it. The hardest part by far was getting the 3 layers to be even in width. My tool was a bread knife. Lesson learned: if I want my cakes to be top-notch, I'm going to need a cake slicer. I saw one at the Bulk Barn last week and nearly drooled. But I refrained. I don't think I make enough cakes to necessitate that. 
By the way, Lara, I still owe you a cake. You can hold me to that!


Pane all'Olive: No Knead Bread


I've been experimenting with no-knead bread since I got this book by Jim Lahey for Christmas last year. This photo shows off the Olive Bread that I made using that method. 


Honestly, this bread is the easiest thing in the world to make.


The idea is to use a small amount of yeast and let it rise for up to 24 hours-- a long time by regular bread-making standards. Then you cook the bread in a large pot or dutch oven, to avoid making the crust too heavy. According to Lahey, that's how bread was made in ancient times, over wood fires. Modern-day methods make bread seem more difficult and time consuming than it has to be. 


Although the history is cool, I was attracted to this recipe because although I enjoy baking, I don't know that I want to lose entire weekends to bread making. 


I've been experimenting with it and adjusting my method for about 6 months now and I think I've got it to a point where I'm happy with it.  Part of the secret to this particular recipe is that the added oil in the olives really softens up the bread. The Olive Bread was one success I have yet to re-create-- the second loaf I made had a strange alcoholic flavour to it. I'm not sure why.Here are a few more pictures:


Essentially this is a mixture of flour, water, salt, olives, and a small amount of yeast. There are also green and black olives, and some pickled [sweet] peppers that were in the jar with them. A very small amount of yeast is used, so the dough rises slowly over a very long period of time.


This picture was taken after the dough had risen.


Those long strings are the strands of gluten that have been developing while it rises. When you knead bread, you are breaking down those strands so that the bread is less chewy and more soft. The no-knead bread has a bit more texture than regular bread because there is so little kneading.


This is a terrible picture, but you get the idea. After the first rise, you dump the dough out onto a floured towel, and shape it a bit to fit the pot.

At this point, I alter the recipe a little. I don't mind doing a bit of kneading, so I usually give the dough about 10 turns or so. This essentially means folding it over and pushing it into the work surface with your palms. The kneading makes the bread a bit softer, which I prefer.


Once it rises a bit more on the towel, you pre-heat the oven and the pot, and then transfer the dough to the hot pot. Bake for 30 minutes or so, and it's done!


You can tell that bread is done cooking if it sounds hollow when you knock on the bottom of it. I learned this baker's secret from my wonderful boyfriend, who learned lots of secrets during his 2 week stint working in a bakery a few years ago.


Strawberry-Rhubarb Pie


I love pie. But who doesn't?


The recipe for this crust actually came from a book I read, which was self-published by Ross's Aunt Tamara, who ran a tea room in Paisley, Ontario, for several years. The tea room is closed now, but the tea and the book that tells its story are both still available. The book is a lovely history of the family's time at the tea room, and is filled with delicious recipes. I would recommend it-- this is probably the best pie crust recipe I've ever tried. The pastry is very easy to work with, and comes out light and flaky. Tamara is obviously an expert in dessert-making.


The filling of this pie was made from fresh local strawberries and some rhubarb from our garden! It was pretty watery, because the strawberries were so fresh. It's always a good idea to let your strawberries dry out in the fridge for a few days if you can, before trying to do anything with them. I learned that the hard way when I made this jam:


Strawberry-Gooseberry Jam


It tastes pretty decent, but is watery for a few reasons. First, the strawberries were very fresh. Second, I was experimenting with making my own pectin from boiled apples. This was a method I learned in a jam-making demonstration at the Guelph Local Food Fest. The demonstration was done by the proprieter of From These Roots, a local maker of hand-made jams and salsas named Krista Harrington.
Her recipe was delicious and 100% local, which was really neat!


But the pectin part didn't work out so well, even though I also added some gooseberries from our garden, which are also supposed to be high in pectin. Still, I think the flavour is the most important thing. In the future I don't think I'll be so hesitant to use store-bought pectin.


We've been experimenting with canning this summer, as well. It will be nice to continue enjoying the fruits of our labor for months to come!


Well, that's it for now-- I think this was a long enough first post. I hope this entices you to return for my next feature: A home-made birthday cake, complete with cherry pie filling made from fresh cherries!


Happy trails!